Locations, areas and storage spots: how they fit together
Understand the three levels Trakr uses to say where your stock is: a location, the areas inside it, and the shelves or bins within each area.
On this page The three levels
Trakr Inventory describes where your stock is in three levels. Once you see how they nest, everything else in the web app (counting, receiving, picking, reports) makes more sense.
The three levels
Think of a street address. The location is the building, the area is a section inside it, and the storage spot is the exact place where an item sits.
| Level | What it is | Northshore example | Where you manage it |
|---|---|---|---|
| Location | A site or business address that holds its own stock | Main Warehouse | Administration > Locations |
| Area | A named section inside a location | Aisle 3 | Products > Product Storage |
| Storage spot | A shelf, bin or rack inside an area | Shelf C-01 | Products > Product Storage |
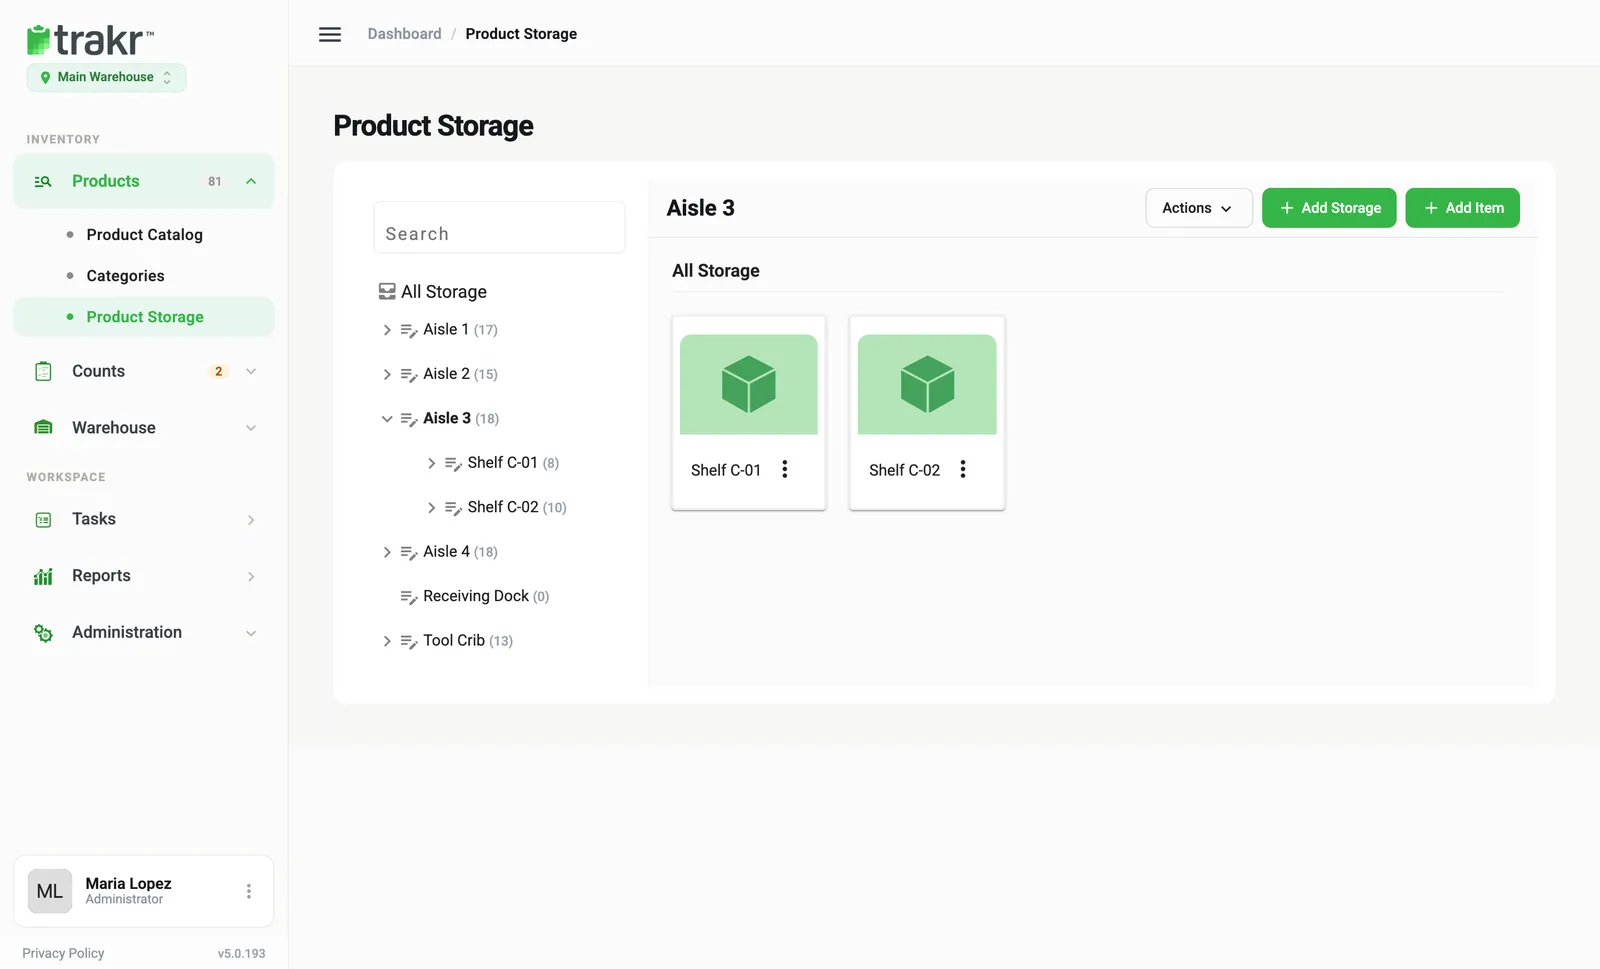
Put together, the Northshore Supply Co. warehouse looks like this:
- Main Warehouse (location)
- Aisle 1, Aisle 2, Aisle 4, Receiving Dock, Tool Crib
- Aisle 3 (area)
- Shelf C-01 (storage spot)
- Shelf C-02 (storage spot)
- Downtown Store (a second location, with its own areas)
How the web app names them
In the web app, areas and storage spots are both created on one page, Product Storage, as a tree. The first level of the tree is your areas. Anything you add inside an area is a storage spot, and you can keep nesting. The web app simply calls each entry a “storage”.
Each location has its own tree. When you switch location, you see a different set of areas.
Which one do I use?
- You have a second site, store or warehouse. Add a location.
- You want to split a site into sections like aisles, rooms or a tool crib. Create areas.
- You want to say exactly where a product sits. Add shelves or bins inside an area, then assign products to them.
Good to know
- Each location has its own areas and shelves, so changing location changes what Product Storage shows.
- Your team only sees the locations they have access to. See Give location access.
- A storage spot that still holds products can’t be deleted until you move or remove them.
Common questions
Do I have to use areas and shelves?
No. A location works on its own. Adding areas and shelves just makes it easier to find stock and to count one part of a location at a time.
Can two locations share the same area names?
Yes. Each location keeps its own list of areas, so Main Warehouse and Downtown Store can both have a Shelf B.
How deep can I go?
As deep as you need. You can add a shelf inside an aisle and a bin inside a shelf, and so on.
Related articles
Was this article helpful?
Thanks, that helps us keep the guides honest. Need more help? Contact us